Website Deployment with Hover & Netlify
This post is not sponsored, I just really like Nelify & Hover
Intro
You've been working for weeks, slinging code in every spare moment. But now you're ready. Ready to show everyone the amazing new site you've built.
But how?
In this post, I'll walk through the process of getting your site on Netlify through GitHub, adding a custom domain from Hover, and setting up sub-domains (if you're unfamiliar with sub-domains, don't worry! We'll go over that later on).
You can purchase domains from Netlify directly. I prefer Hover, so that's what I'll be demonstrating here. Any domain provider should offer a similar process.
Prerequisites
- Github Account (Or GitLab or BitBucket - whichever you prefer)
- Netlify Account
- Hover Account - This is only required if you will be purchasing and connecting a custom domain through hover.
- Create a GitHub Repository for your site and upload your files there.
How to Github
If you need help with the last prerequisite, feel free to reach out to me or see if these articles help:
Git, Github, & Workflow Fundamentals
Deploy to Netlify
The first step is to get your site on Netlify. From app.netlify.com, click the New site from Git button.

On the next page under "Continuous Deployment", select "GitHub" (or your git service of choice).

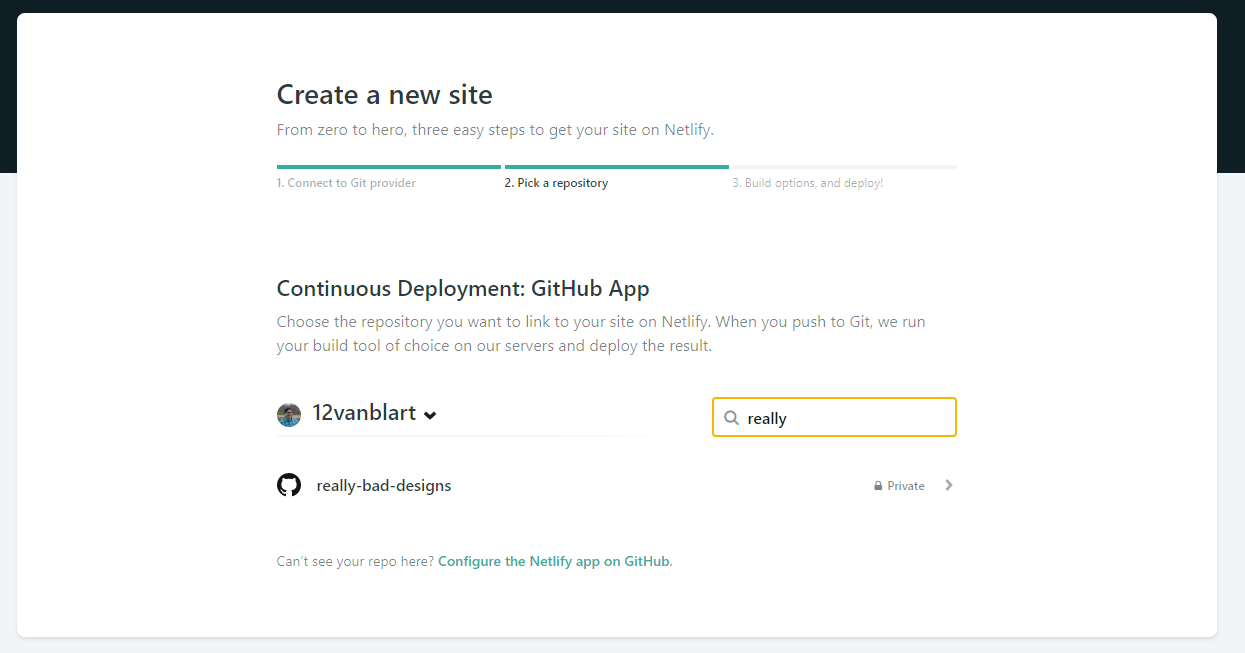
This will open a new window to authenticate your GitHub account. Sign in and approve the connection (once reading the fine print, of course). Now you'll get to pick which repository you want to deploy from. For me, I'll be using my "really-bad-designs" repository.
Now you will inform Netlify which branch you want to deploy from, as well as the build process if you're using a static site generator like Gatsby or Gridsome.
In my case, I'm only deploying index.html and index.css files, so I don't have a build process. Once ready, click the Deploy Site button and you'll be directed to a page that looks roughly like this:

The important thing on this page is that initially you'll see "Site deploy in progress". This means Netlify is in the process of deploying your site. For future deployments, your site will still be available while Netlify builds (one of the many reasons Netlify is so awesome!) and you can track build processes from this page.

After a minute or two, refresh your page and you'll see the "Site deploy in progress" message has changed into a URL. If you click/navigate to this URL, you'll see that your site is live and available to the world!
Applying a Custom Domain
As cool as agitated-keller-fb140b is, I really want to update it to my custom domain - reallybad.design!
Before applying a custom domain, we have to make sure we own the domain. If anyone could route google.com to their personal website, imagine the chaos!
Purchasing a domain from Hover
Hover makes the finding and purchasing a domain process easy! From Hover's home page, type your desired name into the search box and it will show you available domains (or similar domains) and how much they cost.
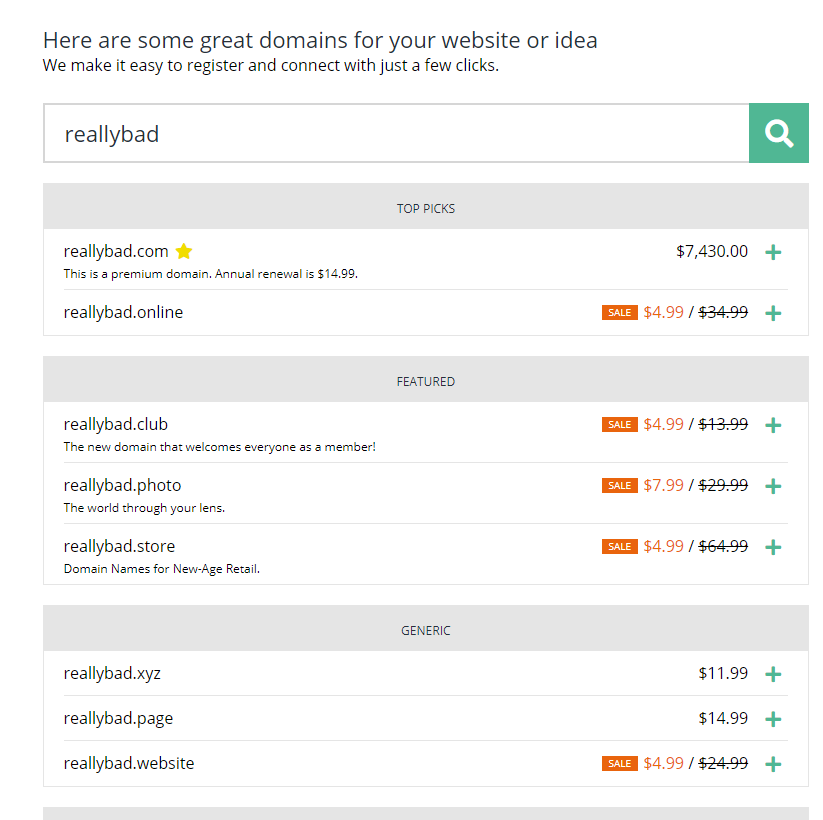
Once you find one you like, click the + icon to add it to your cart and click Proceed to Cart on the right hand side (Cart icon in header on mobile). From here, add your payment information and proceed through checkout.

Congrats! You just bought your domain! 🎉
Connecting to Netlify
Once purchased, head to www.hover.com/control_panel/domains and click your domain name. This will bring you to the following dashboard-like page:

You'll click on the DNS tab, which will direct to a list of records.

Optional Step: You can delete the 2 default "A" records (Type A, Value 64.98.145.30). I choose to do this for the sake of keeping the list less cluttered, but there shouldn't be any difference if you decide to keep them.
Now back on Netlify, you'll click Set up a custom domain under the "Getting Started" card. This will bring you to the below page where you will enter your new domain name (for me, reallybad.design). Click Verify once entered, then Yes, add domain when prompted to verify that you own the domain.

This will redirect you to the Domain settings within Netlify. You'll notice at the top of the list that there are warnings about "Check DNS Configuration". Click one of these (I'm starting with the non-www one).

Hover doesn't (currently) support ANAME or ALIAS records, so we'll use the alternate option of pointing an A record to the listed IP address. On the Hover domain list, click Add a record and input * as the host name and the IP provided by Netlify as the value. Repeat with @ as the host name.
reallybad.design:
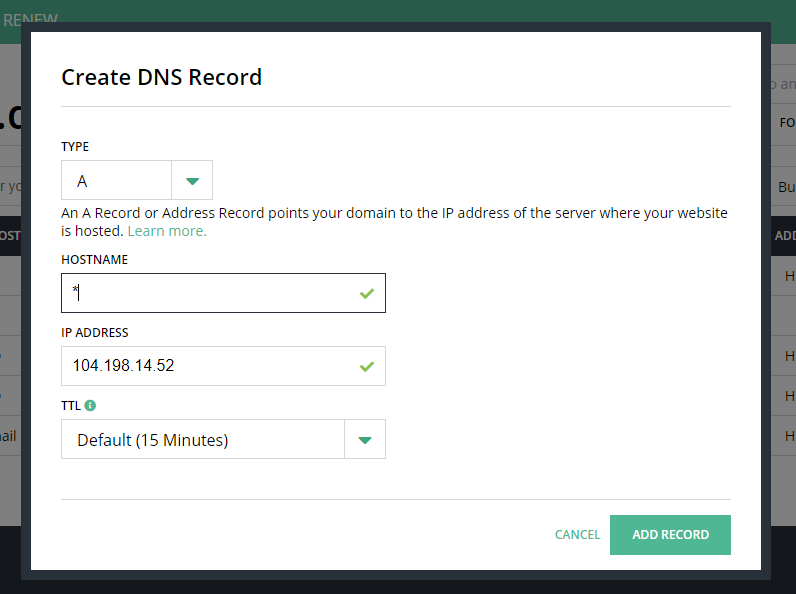

Note: Time to live (TTL) is the amount of time it will take for your changes to take effect. Additionally, it may take up to 24 hours for the www address to propagate.
Configure HTTPS
Once you no longer see the "Check DNS configuration" error (may require refreshing and patience), scroll to the bottom of the Domain Management page and you'll see a section for "HTTPS" that will initially look like this:

The cool part of Netlify is that you don't have to do anything to configure this (unless you want to add your own custom SSL certificate)! It may take up to a day to see the HTTPS show properly, but it should look like this once setup:

Site is Live!
At this point, your main site is setup and live - HTTPS and all!
Hover:
Site: reallybad.design
Deploying to a subdomain
So now we have reallybad.design and www.reallybad.design deployed, but what if we want to deploy really.reallybad.design? This is what is known as a subdomain - Let's walk through the process!
What are "subdomains"?
I'm not going to go too much into that here, but at a high level, subdomains are othersite.yourwebsite.com. If you want to know more about them, I recommend these awesome posts:
Organize your side projects with a single domain
Why Heroku doesn't want you to be naked
Deploy the new site
To start, we will setup a new Github repository and follow the Deploy to Netlify steps above and jump back here once you hit the Applying a Custom Domain section.
Point Subdomain to new site
At this point, you should be at the Netlify Dashboard which should look similar to this:

Once again, we will be clicking the Set up a custom domain link. On the new page, you'll type in the subdomain that you would like to set. For me, that will be really.reallybad.design.
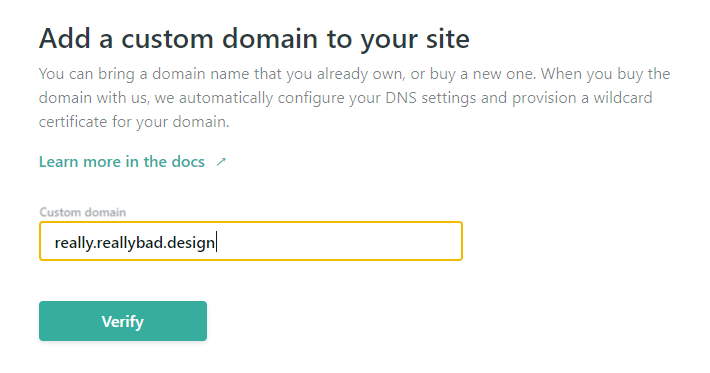
Then click Verify and Yes, add domain once the message to verify that you own your domain appears.
That's it! Your site is now live at your designated subdomain!
HTTPS for subdomain
At this point, you may see this message about not being setup for HTTPS:
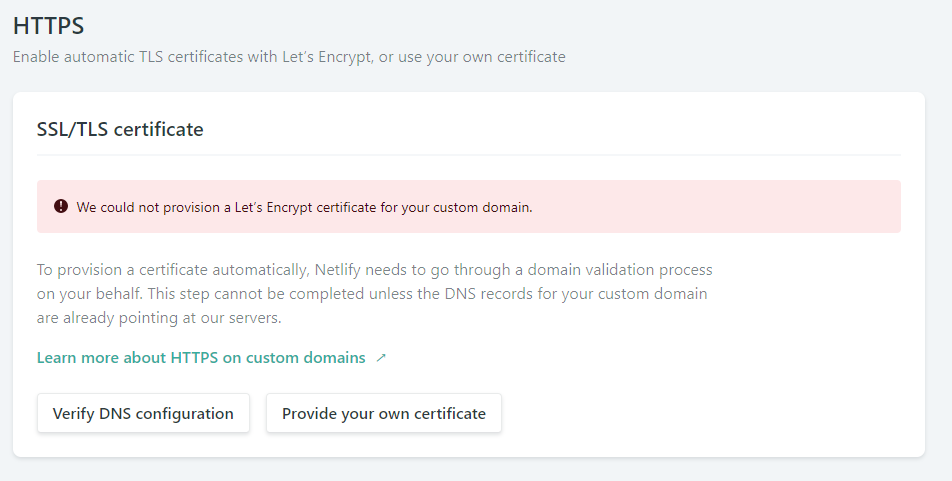
In the background, Netlify is working on handling this for you, and may take a few minutes to process, but shouldn't require any additional input from you.
If you are still seeing this error after ~30 minutes, you can click through the Verify DNS Configuration prompt. If the error is still hanging around after a day or so, I would recommend reaching out to Netlify Support. I had to resolve a certificate issue in the past and they make it very easy were very friendly!
Closing
Thanks for reading about Hover + Netlify to deploy a website! If you use this to deploy something, let me know below - I'd love to see!
Additionally, reallybad.design and really.reallybad.design are open source, so feel free to help make the site worse (better?)!